Why You’ll Love This Sea Salt Ice Cream Recipe
Why will you love this sea salt ice cream recipe? It’s the perfect blend of creamy sweetness and a hint of salty goodness that’ll surprise your taste buds.
I’ve always been a fan of unique flavors, and this one hits the spot every time. The richness of the custard combined with the light, airy whipped cream creates a delightfully smooth texture.
Plus, making it at home means I can adjust the saltiness to my liking. It’s a fun process that lets me release my inner ice cream chef.
Trust me, once you try it, you’ll be hooked!
Ingredients of Sea Salt Ice Cream
When it comes to making your own ice cream, there’s nothing quite like the joy of mixing up a batch of sea salt ice cream. Trust me, it’s a game changer. Envision this: a creamy, dreamy scoop with just the right amount of sweetness, perfectly balanced by that hint of salty goodness. It’s like a little party for your taste buds.
And the best part? You get to control the ingredients, so you can make it just the way you like it. Let’s explore the essentials you’ll need to whip up this delightful treat.
Here’s what you’ll need for your sea salt ice cream:
- 2 eggs
- 2 cups milk
- 1/3 cup sugar
- 1 teaspoon vanilla extract
- 1 cup heavy whipping cream
- Sea salt (but keep it light; you can always add more)
- Blue food coloring (optional, but it adds a nice touch)
- Green food coloring (optional, just a few drops for fun)
Now, while these ingredients are pretty straightforward, there are a couple of things to keep in mind. First off, the quality of your ingredients matters. Using fresh eggs and good milk can really elevate the flavor.
And don’t be shy with the sea salt; it’s all about finding that perfect balance between sweet and salty. Just remember, you can always add more, but you can’t take it out once it’s in there.
Plus, if you’re feeling adventurous, you can tweak the colors or even try adding different flavorings. The world is your ice cream cone, so get creative!
How to Make Sea Salt Ice Cream
Making sea salt ice cream isn’t just a cooking project; it’s an adventure for your taste buds. Let’s explore the steps you need to follow to whip up this creamy delight.
First, take 2 eggs and separate them into two good-sized bowls. You’ll want to beat those egg whites until they’re nice and stiff – think of them as tiny clouds waiting to add some lightness to your ice cream.
In the second bowl, mix the 2 egg yolks with 1/3 cup sugar until it’s thick and creamy. This is the base of your ice cream, so give it a good whisk, and don’t be afraid to channel your inner pastry chef.
Now, let’s get the milk involved. Pour 2 cups of milk into a pot and slowly bring it to a boil over medium heat, stirring occasionally. This is where patience comes in – don’t rush it.
Once it’s hot and steamy, pour that milk into your yolk and sugar mixture while stirring it constantly. This is the moment you’ll feel like a magician, transforming simple ingredients into something extraordinary.
Pour this mixture back into the pot and heat it on medium until it thickens up into a custard. Remember, we’re not boiling here, just gently coaxing it to a creamy consistency. If you’re not sure if it’s thick enough, just aim for a coating on the back of a spoon.
Once your custard is ready, fold it into the beaten egg whites, mixing them gently. This step is essential because it adds fluffiness to your ice cream.
Next, sprinkle in some sea salt, but be careful – start with a pinch and taste as you go. You want that perfect salty-sweet balance.
After you’re satisfied with the flavor, chill your mixture in the fridge. Once it’s cool, stir in 1 cup of heavy whipping cream and 1 teaspoon of vanilla extract.
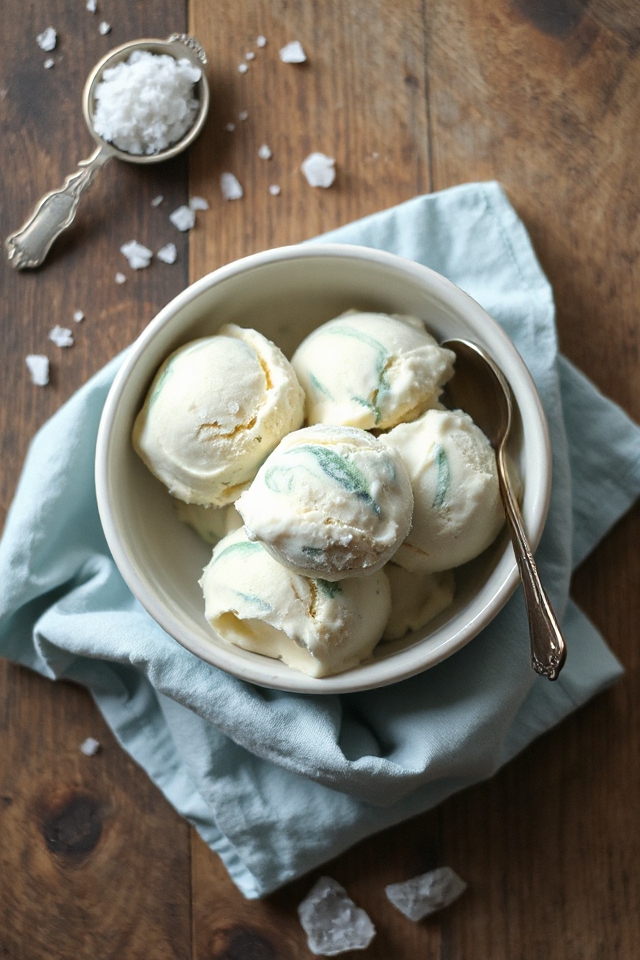
If you’re feeling colorful, toss in 12 drops of blue food coloring and 3 drops of green food coloring for that ocean-inspired look.
Now comes the hardest part: freezing it. If you have an ice cream maker, follow the instructions for freezing. If not, no worries. Just pour the mixture into metal cake pans and pop them in the freezer.
Every 30 minutes, give it a stir to break up those ice crystals until it’s uniformly frozen. And there you have it – your very own sea salt ice cream, ready to scoop and enjoy.
Sea Salt Ice Cream Substitutions & Variations
After whipping up your sea salt ice cream, you might find yourself wanting to experiment with different flavors or ingredients.
I love adding a splash of caramel or chocolate for a sweet twist. You could also try infusing the milk with herbs like lavender or mint for a unique touch.
If you’re dairy-free, coconut milk works great instead of regular milk and cream. For a fruity variation, toss in fresh berries or pureed mango.
Don’t forget to adjust the sea salt to balance those flavors! Each change can lead to a delightful new dessert experience worth savoring. Enjoy experimenting!
What to Serve with Sea Salt Ice Cream
Pairing sea salt ice cream with the right accompaniments can elevate your dessert experience to new heights.
I love serving it with warm brownies or chocolate chip cookies, as the contrast of temperatures and textures is heavenly. A drizzle of caramel or chocolate sauce adds a sweet richness that complements the saltiness perfectly.
For a fruity twist, fresh strawberries or a berry compote work wonders, enhancing the flavors beautifully. Don’t forget a sprinkle of crushed nuts for added crunch!
Whatever you choose, the key is to find flavors that harmonize with the creamy, salty goodness of the ice cream. Enjoy!
Additional Tips & Notes
While preparing sea salt ice cream can be a delightful experience, there are a few tips I like to keep in mind to guarantee the best results.
First, make sure your ingredients are fresh, especially the eggs and cream. I also recommend using high-quality sea salt for that perfect balance of flavor.
Don’t rush the cooling process; patience is key to achieving the right texture. If you’re adding color, a little goes a long way—start with less and adjust as needed.
Finally, for a creamier texture, I sometimes let the ice cream sit out for a few minutes before serving. Enjoy!