Why You’ll Love This Dark Chocolate Ice Cream Recipe
If you’re a fan of rich and indulgent desserts, you’re going to love this dark chocolate ice cream recipe. It’s the perfect treat for any occasion, whether you’re celebrating or just need a little self-care.
The intense chocolate flavor hits all the right notes, satisfying your cravings in every scoop. Plus, the creamy texture is simply irresistible, making it feel like a luxurious dessert experience.
I promise you won’t be able to stop at just one serving! With its balance of sweetness and depth, this ice cream truly elevates your dessert game, leaving you dreaming of that next delicious bite.
Ingredients of Dark Chocolate Ice Cream
When it comes to making dark chocolate ice cream, the ingredients are the stars of the show. They come together to create that divine, creamy, chocolatey goodness that we all crave. You might think you need a ton of fancy ingredients, but the reality is that you probably have most of these items in your kitchen already.
Let’s break down what you’ll need for this delicious treat.
Ingredients for Dark Chocolate Ice Cream:
- 8 egg yolks
- 1 1/2 cups caster sugar
- 600 ml cream
- 600 ml milk
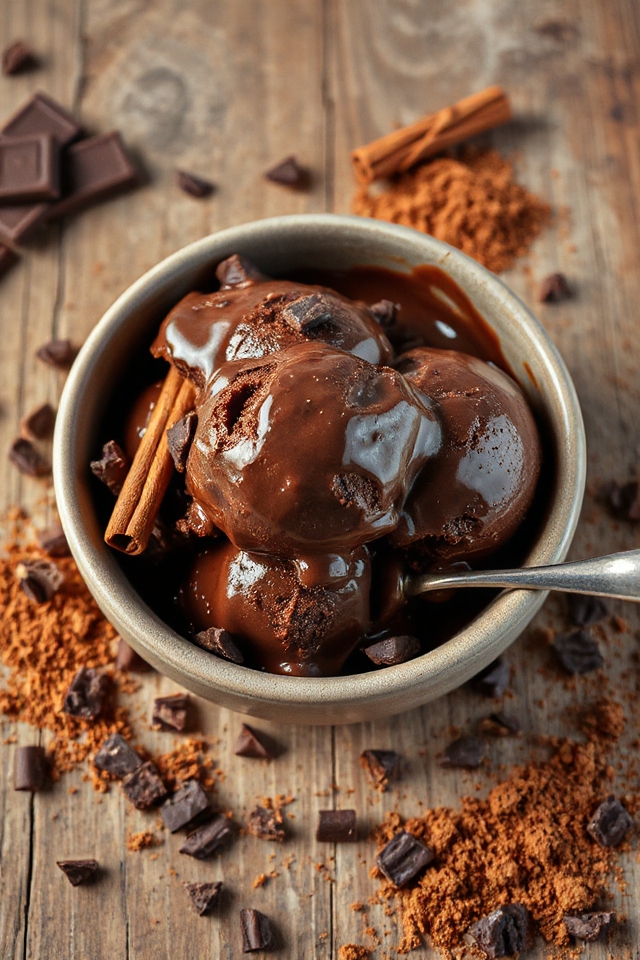
- 180 g dark chocolate
- 1 tablespoon cocoa powder
- 1 teaspoon cinnamon
- 1 teaspoon vanilla extract
Now, let’s chat about these ingredients a bit. First off, the chocolate. Choosing a good quality dark chocolate can make all the difference in the world. You want something that’s rich and has a cocoa content that makes your taste buds sing.
As for the cream and milk, using full-fat options will give you that luscious texture that’s oh-so-satisfying. And don’t skip the egg yolks—they’re not just there for show! They help create that smooth, creamy base that makes the ice cream so delightful.
Finally, a pinch of cinnamon and a splash of vanilla adds depth to the flavor, taking it from good to “Oh my goodness, I need more of this!”
How to Make Dark Chocolate Ice Cream
Making dark chocolate ice cream at home is an adventure that can be both rewarding and delicious. So, let’s get started on this chocolaty journey. First, grab your saucepan and combine 600 ml of cream, 600 ml of milk, 180 g of dark chocolate, 1 tablespoon of cocoa powder, 1 teaspoon of cinnamon, and 1 teaspoon of vanilla extract. You’re going to want to warm this mixture over low heat, stirring frequently—this isn’t a race, so take your time.
The key here is to melt the chocolate gently until the mixture starts to simmer, and you see it separate into a dark milky layer with a foamy layer on top. Oh, that chocolatey aroma is going to make you feel like a kitchen wizard.
While that’s happening, let’s turn our attention to the egg yolks. You’ll need 8 of them, so separate those yolks from the whites (don’t worry, it’s not as scary as it sounds). In a mixing bowl, beat the egg yolks together with 1 1/2 cups of caster sugar until the mixture turns pale and creamy. It’s kind of like magic watching it transform.
Once your chocolate concoction is ready, take a moment to breathe in that sweet, sweet scent, and then slowly add a quarter to half of it to the egg mixture. Whisk, whisk, whisk—this is where you need to be careful. You don’t want those eggs cooking too fast, or you’ll end up with scrambled eggs in your ice cream (yikes!). If you see any lumps, just strain the mixture through cheesecloth to rescue your ice cream dreams.
Now, return that egg mixture to the saucepan and cook it over low heat until it thickens enough to coat the back of a metal spoon. This step is vital; it’s where the magic happens. Once thickened, allow it to cool, and then chill it for at least two hours—though overnight is even better if you can wait (but who can resist the temptation of homemade ice cream?).
To prevent a pesky skin from forming, place cling wrap directly on top of your custard. After chilling, whip the mixture in a chilled bowl until it’s light and fluffy, resembling a runny chocolate mousse. If you have an ice cream maker, now’s the time to churn according to the machine’s instructions.
If not, don’t fret. Just pop your mixture in the freezer for an hour, then take it out and whip it again. Repeat this process a couple of times until you achieve your desired consistency. And remember, this ice cream will freeze harder than what you find in stores, so give it some time to soften before serving. Enjoy the creamy, chocolatey goodness—you’ve earned it!
Dark Chocolate Ice Cream Substitutions & Variations
While dark chocolate ice cream is a decadent treat on its own, there are plenty of ways to customize it to suit your taste or dietary needs.
You can replace the egg yolks with silken tofu for a vegan version, or use coconut milk for a creamier texture. If you prefer a sweeter taste, swap in milk chocolate or adjust the sugar.
For a spiced twist, add chili powder or espresso. You might even try adding mix-ins like nuts, fruit, or cookie chunks to create your unique flavor profile.
The possibilities are endless—get creative and enjoy experimenting!
What to Serve with Dark Chocolate Ice Cream
If you’re looking to elevate your dark chocolate ice cream experience, consider pairing it with complementary flavors and textures.
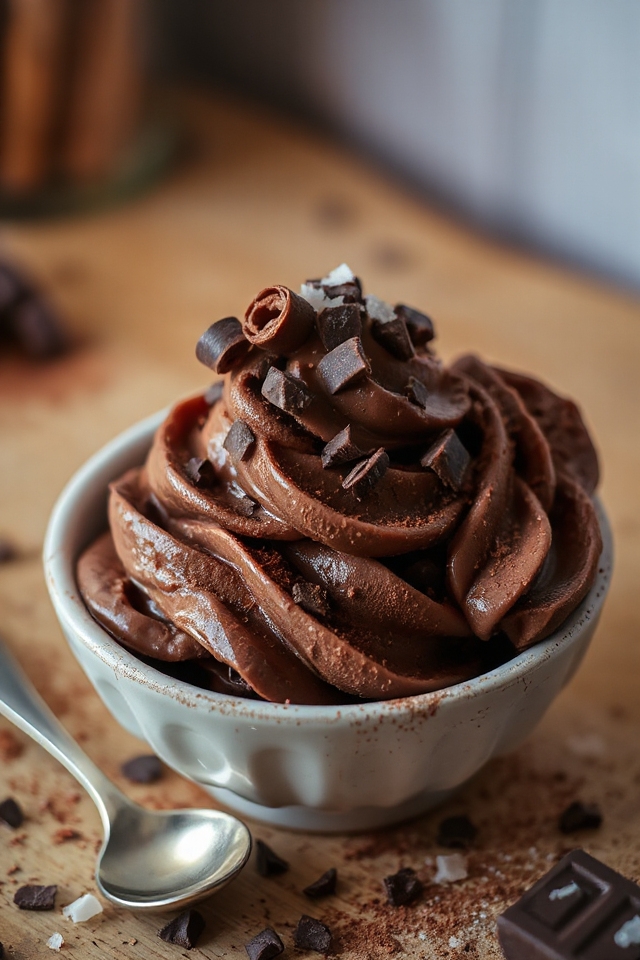
I love serving it with fresh raspberries or strawberries; their tartness beautifully contrasts the richness of the ice cream. A sprinkle of sea salt can enhance the chocolate flavor, too.
For a crunchy element, crushed nuts or a graham cracker crumble adds a delightful texture. Drizzling warm caramel or chocolate sauce on top creates a decadent touch.
Finally, a dollop of whipped cream is always a classic choice. These simple additions can truly transform your dessert into something extraordinary!
Additional Tips & Notes
To guarantee your dark chocolate ice cream turns out perfectly, I recommend using high-quality dark chocolate with a cocoa content of at least 70%.
Don’t skip the chilling step; it really enhances the flavors. If you notice any lumps in your mixture, strain it through cheesecloth to confirm a smooth texture.
Remember, this ice cream will freeze harder than store-bought versions, so plan to let it soften for about 20 minutes before serving.
Finally, if you’re mixing by hand, make sure your bowl and utensils are chilled to achieve that light, fluffy consistency.
Enjoy your delicious creation!