Why You’ll Love This Chocolate Peanut Butter Ice Cream Recipe
If you’re a fan of rich, indulgent flavors, you’re going to love this Chocolate Peanut Butter Ice Cream recipe. It’s the perfect combination of velvety chocolate and creamy peanut butter, creating a dessert that’s both satisfying and delicious.
Each spoonful is a delightful treat, melting in your mouth and leaving you craving more. Plus, it’s incredibly easy to make, allowing you to whip up a batch in no time.
Whether you’re enjoying it on a hot summer day or as a midnight snack, this ice cream will elevate any occasion. Trust me, once you try it, you won’t want to stop!
Ingredients of Chocolate Peanut Butter Ice Cream
When it comes to whipping up a delightful dessert, nothing quite compares to the smooth, creamy goodness of Chocolate Peanut Butter Ice Cream. Imagine a world where chocolate and peanut butter come together in perfect harmony, creating a treat that’s simply irresistible.
But before you plunge into the fun part of making this heavenly concoction, let’s take a moment to gather our ingredients. Trust me, having everything ready to go will make the process so much smoother, just like that luscious ice cream you’re about to create.
Here’s what you’ll need to get started:
- 3/4 cup whole milk
- 1/2 cup sugar
- 1 1/2 tablespoons all-purpose flour
- 1 pinch salt
- 1 egg, beaten
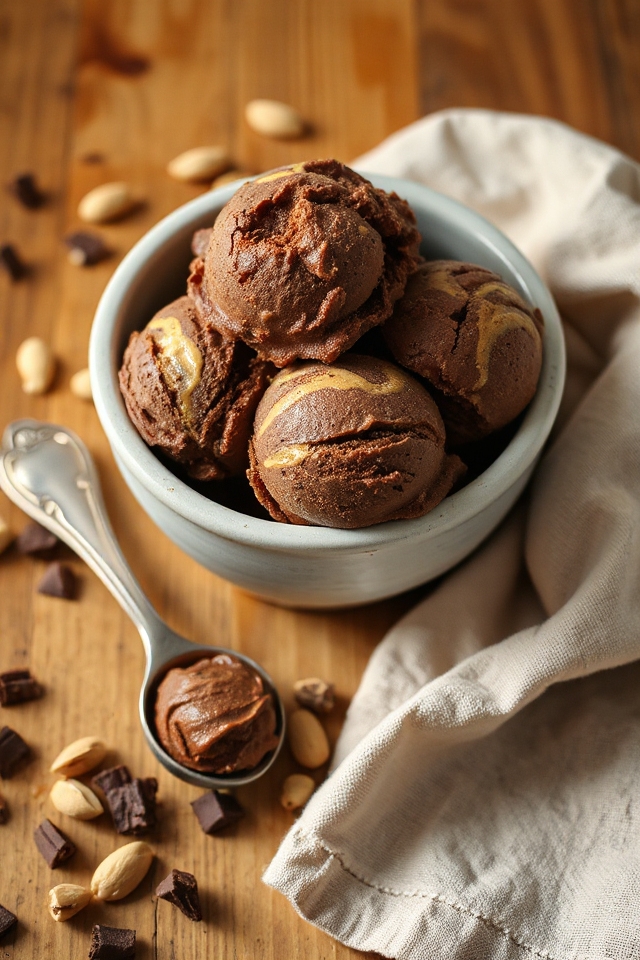
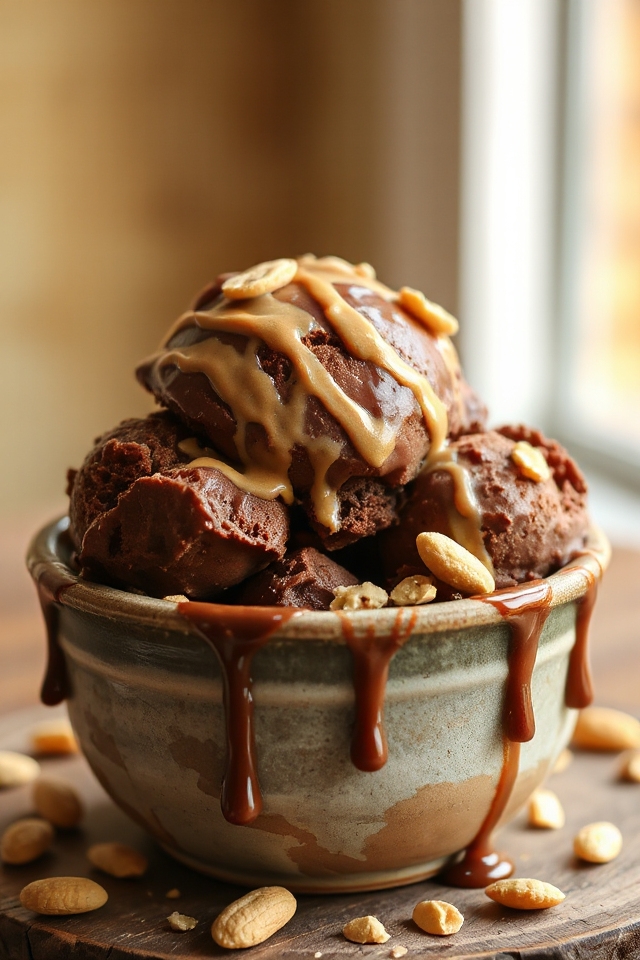
- 6 tablespoons chocolate peanut butter
- 1 1/2 cups light cream
- 1/2 cup heavy cream (whipping cream)
- 1 teaspoon vanilla extract
Now, let’s talk about the ingredients a bit more. Whole milk is essential for that creamy texture, and sugar sweetens the deal, of course. You might be wondering about the flour—it’s there to help thicken the mixture, giving your ice cream that luxurious feel.
And don’t skimp on the chocolate peanut butter; it’s the star of the show. If you have a favorite brand, go for it! As for the creams, the light cream and heavy cream work together to create that perfect, rich mouthfeel.
And vanilla? Well, it just adds that little extra something that makes everything taste better. So, gather your ingredients, and get ready to make some ice cream magic happen. Who knew a little bit of cooking could lead to such sweet satisfaction?
How to Make Chocolate Peanut Butter Ice Cream
Alright, let’s plunge into the delightful process of making Chocolate Peanut Butter Ice Cream. You’re going to want to start by grabbing your heavy saucepan because we’re about to create some creamy magic.
First, whisk together 3/4 cup whole milk, 1/2 cup sugar, 1 1/2 tablespoons all-purpose flour, and a pinch of salt over medium heat. Keep stirring, and I mean really keep stirring—don’t let that mixture sit and sulk at the bottom of the pan. We want it to thicken up nicely, like that friend who always shows up with snacks to a party. Once it’s looking thick and luscious, turn off the heat.
Now, here’s where things get a bit tricky, but don’t fret. You’re going to take a small ladle or spoon and scoop about 2 tablespoons of that hot milk mixture into your beaten egg (just one egg, beaten). This is called tempering, and it prevents your egg from turning into scrambled egg bits in our ice cream.
Whisk like your life depends on it as you slowly add the hot mixture. Once that’s done, pour the egg mixture back into the pot in a thin stream, whisking constantly to keep everything smooth. Cook this mixture for just two more minutes, then turn off the heat and get ready for the star of the show: the 6 tablespoons of chocolate peanut butter.
Whisk that in like you mean it, and then scrape everything into a bowl, cover it with plastic wrap, and let it chill in the fridge for about three hours. Patience, my friend, patience.
After your mixture has cooled down and is ready to party, take it out and whisk in 1 1/2 cups of light cream. You might find the chocolate peanut butter is a bit stubborn at first, but just keep whisking—it’s like coaxing a cat out from under the bed.
Once that’s combined, add in 1/2 cup of heavy cream and 1 teaspoon of vanilla extract. Now you’re ready to churn! Follow the instructions for your ice cream maker; I usually let mine run for about 25 minutes.
After that, transfer it to a container and freeze for several hours to let it harden. And just like that, you’ve created a creamy, dreamy Chocolate Peanut Butter Ice Cream that’s sure to impress anyone lucky enough to have a scoop. Enjoy that sweet victory; you’ve earned it!
Chocolate Peanut Butter Ice Cream Substitutions & Variations
While I adore the classic Chocolate Peanut Butter Ice Cream recipe, there are plenty of substitutions and variations you can explore to make it your own.
You might try using almond milk instead of whole milk for a dairy-free option, or swap out sugar for maple syrup for a natural sweetener.
If you’re feeling adventurous, add crushed Oreos or chocolate chips for extra texture. For a richer flavor, consider using dark chocolate peanut butter.
You can even mix in a swirl of caramel or other nut butters, like cashew. The possibilities are endless, so have fun experimenting!
What to Serve with Chocolate Peanut Butter Ice Cream
After experimenting with different substitutions and variations for Chocolate Peanut Butter Ice Cream, it’s time to think about what you can serve alongside this indulgent treat.
I love pairing it with warm brownies or chocolate chip cookies—there’s something magical about that combination. You could also serve it with fresh berries for a tart contrast or drizzle it with chocolate or caramel sauce for extra sweetness.
If you’re feeling adventurous, try it in a milkshake or alongside a slice of rich cheesecake.
Whatever you choose, make sure it enhances the creamy, nutty flavor of the ice cream!
Additional Tips & Notes
To guarantee your Chocolate Peanut Butter Ice Cream turns out perfectly, I recommend using high-quality ingredients, especially for the chocolate peanut butter.
Don’t skip the chilling step; it’s essential for the right texture. When mixing in the creams, be patient—your mixture may seem stubborn at first, but it’ll come together.
If you want an extra creamy texture, consider adding a tablespoon of vodka to the mix before churning; it helps prevent ice crystals.
Finally, let it freeze for several hours to achieve the perfect scoopable consistency. Enjoy your homemade treat, and don’t hesitate to share with friends!