Why You’ll Love This Homemade Rocky Road Ice Cream Recipe
When you’re craving something indulgent and delightful, this homemade Rocky Road ice cream is just what you need. It’s creamy, rich, and packed with flavor, making every scoop a celebration.
The combination of chocolate, marshmallows, and nuts creates a satisfying texture that keeps me coming back for more. I love how easy it’s to make, too—just mix, freeze, and enjoy!
Plus, it’s perfect for sharing during gatherings or cozy nights in. Trust me, once you’ve tasted this decadent treat, store-bought ice cream just won’t measure up. You’ll be hooked and craving it again before you know it!
Ingredients of Homemade Rocky Road Ice Cream
When it comes to making homemade Rocky Road ice cream, having the right ingredients is key to crafting that delicious, creamy goodness. You might already have some of these pantry staples on hand, but let’s make sure you’re fully stocked before you begin this sweet journey.
Trust me, you won’t want to miss out on any of these components, or your ice cream might just end up lacking that magical twist that makes it so special.
Here’s what you need:
- 2 cups 2% low-fat milk
- 2 cups heavy whipping cream
- 1 cup sugar
- 1/2 teaspoon salt
- 1 teaspoon vanilla extract
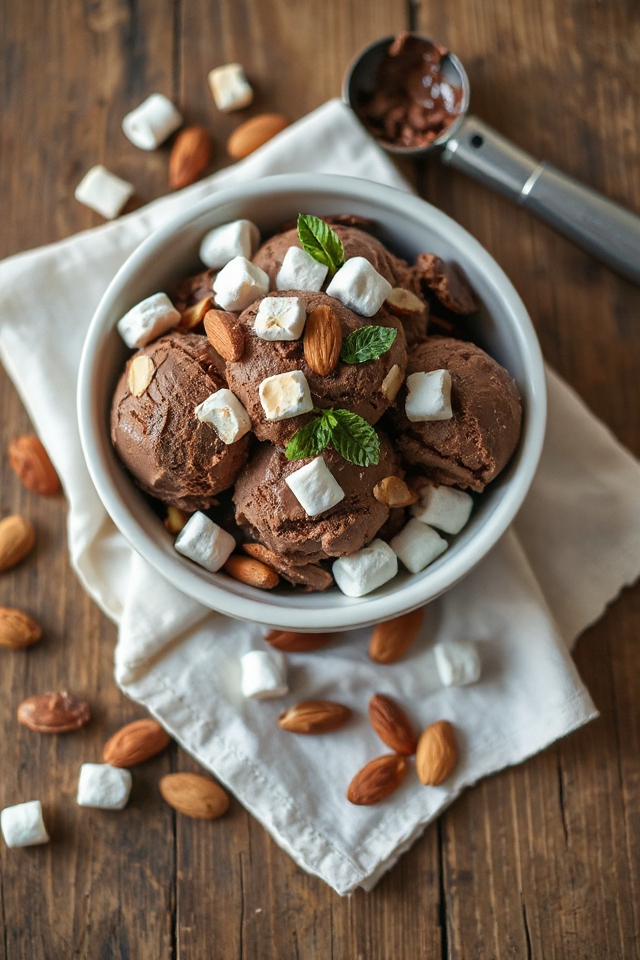
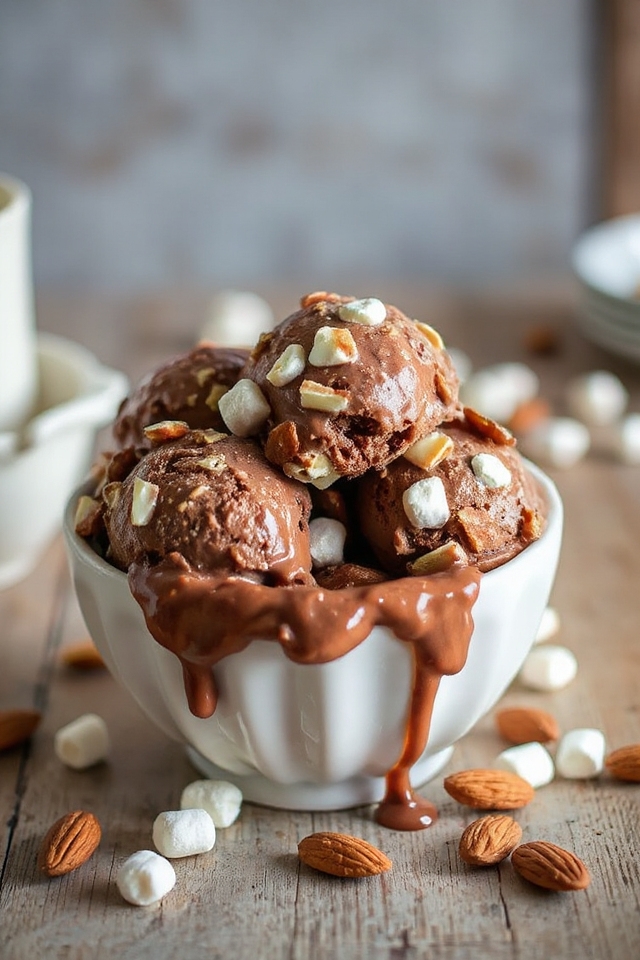
- 1 1/2 cups miniature marshmallows (or half a bag, if you’re like me and can’t resist)
- 2/3 cup sliced almonds
- 1/2 cup unsweetened cocoa
Now, a few things to keep in mind while gathering these ingredients. First, the type of milk you use can slightly alter the creaminess of your ice cream.
While I go for the 2% because it strikes a nice balance, you can certainly experiment with whole milk for a richer flavor.
And hey, if you’re feeling adventurous, why not try mixing in some other nuts or even chocolate chips? I mean, what’s better than chocolate with more chocolate, right?
Finally, make sure your heavy whipping cream is fresh; trust me, you don’t want to be the person who accidentally makes ice cream that tastes a little… off.
How to Make Homemade Rocky Road Ice Cream
Making your own homemade Rocky Road ice cream isn’t just a treat; it’s a delightful adventure in the kitchen. So, let’s jump in!
Start with 2 cups of 2% low-fat milk and pour it into a mixing bowl. Next, add 2 cups of heavy whipping cream to the milk. This is where the magic begins—mixing these two together creates a base that’s rich and creamy.
Now, sprinkle in 1 cup of sugar and 1/2 teaspoon of salt. The sugar will sweeten the deal, while the salt will enhance all those flavors. Don’t forget to add in 1 teaspoon of vanilla extract. This little splash of flavor is like a warm hug for your taste buds.
Now comes the fun part—stirring everything together! You want to mix it until all the sugar dissolves, and you’ve got a nice, smooth base. This is the moment you can get creative; feel free to taste it (I mean, who can resist?).
Once it’s all blended, toss in 1 1/2 cups of miniature marshmallows, 2/3 cup of sliced almonds, and 1/2 cup of unsweetened cocoa. The marshmallows add that delightful chewy texture, while the almonds give a nice crunch. The cocoa? Well, that’s your chocolatey goodness right there.
After everything is combined, take this luscious mixture and pour it into the cylinder of your ice cream maker. Follow the manufacturer’s directions for freezing.
While it’s churning away, you might want to do a little dance in the kitchen—after all, you’re making ice cream. Once it’s done, transfer your Rocky Road ice cream to a container and let it set in the freezer for 2 to 4 hours.
Waiting is the hardest part, isn’t it? But I promise, when you finally scoop that creamy, dreamy ice cream into a bowl, it’ll all be worth it. Enjoy every spoonful of your homemade creation!
Homemade Rocky Road Ice Cream Substitutions & Variations
If you want to put a personal twist on your homemade Rocky Road ice cream, there are plenty of substitutions and variations to explore.
For a richer flavor, try using whole milk instead of 2% or swap in coconut milk for a dairy-free version. You can also experiment with different nuts, like walnuts or pecans, to change the crunch.
If you’re not a fan of marshmallows, consider adding caramel swirls or chocolate chips for extra indulgence.
And for a unique twist, toss in a scoop of peanut butter or crushed cookies to elevate your dessert experience.
Enjoy your creative spin!
What to Serve with Homemade Rocky Road Ice Cream
To truly elevate your homemade Rocky Road ice cream experience, consider pairing it with complementary flavors and textures.
I love serving it alongside warm brownie bites; the chocolatey richness enhances the ice cream’s cocoa notes. For a revitalizing contrast, a drizzle of tangy raspberry sauce works wonders, cutting through the creaminess.
If I’m feeling indulgent, I’ll add a sprinkle of crushed graham crackers for a bit of crunch. Don’t forget about toppings like whipped cream or extra almonds!
Each addition brings a new layer of flavor, making my Rocky Road ice cream even more delightful and memorable. Enjoy experimenting!
Additional Tips & Notes
When it comes to homemade Rocky Road ice cream, a few additional tips can make your experience even better.
First, chill your ice cream maker’s bowl overnight; this helps the ice cream freeze faster. If you prefer a richer flavor, try using dark chocolate cocoa instead of unsweetened.
Don’t shy away from experimenting with mix-ins—chopped nuts or even crushed cookies can add a delightful crunch.
Finally, let your ice cream sit at room temperature for a few minutes before scooping; it makes serving a breeze.
Trust me, these little tweaks can elevate your Rocky Road to the next level!