Why You’ll Love This Basic Ice Cream Recipe
There’s something truly delightful about making your own ice cream. I love the creativity it brings, allowing me to experiment with flavors and textures.
There’s an unmatched satisfaction in crafting a sweet treat from scratch, knowing exactly what’s in it. It’s a fun activity that can brighten any day, whether I’m whipping it up alone or sharing the experience with friends and family.
Plus, there’s nothing quite like enjoying a scoop of my homemade creation on a warm day. You’ll find that each batch feels personal, and I can guarantee you’ll develop a special bond with your ice cream.
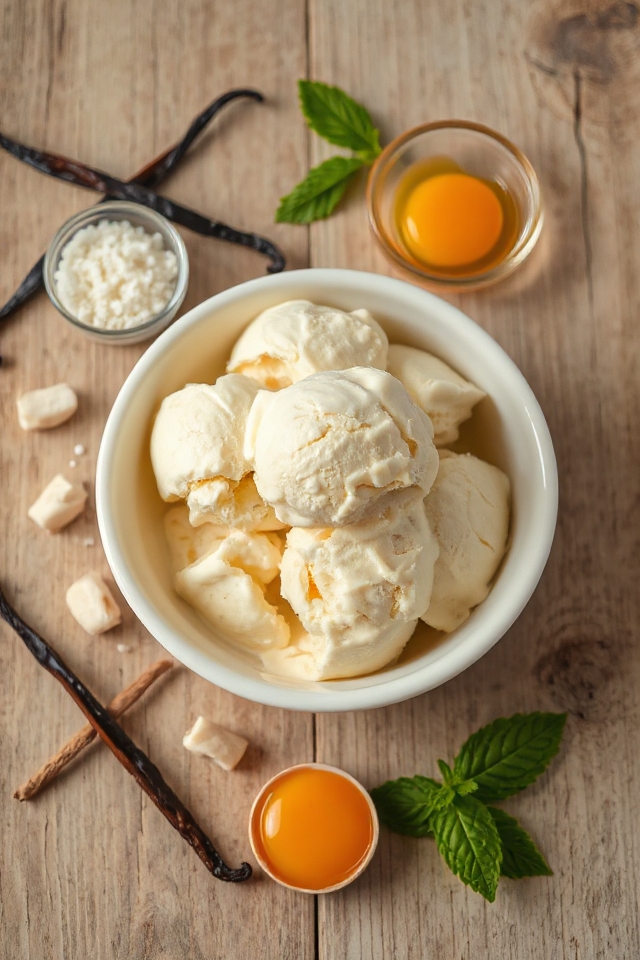
Ingredients of Basic Ice Cream
When it comes to making ice cream, the ingredients you choose set the foundation for that creamy, dreamy delight you’re about to create. While you could easily grab a tub from the store, there’s something magical about gathering fresh ingredients and blending them into a luscious treat. It’s like a science experiment in your kitchen, but way tastier.
Plus, you get to play around with flavors, sweetness levels, and textures. Think of all the fun you can have! So, let’s plunge into the essentials you’ll need for this basic ice cream recipe.
Here’s what you’ll need to whip up your own batch of ice cream:
- 1 1/2 cups half-and-half
- 1/2 cup heavy cream
- 1/2 cup granulated sugar
- 4 egg yolks
Now, let’s chat about these ingredients for a moment. Half-and-half and heavy cream are like the dynamic duo of creaminess—together, they create that rich texture that makes ice cream so irresistible.
If you’re feeling adventurous, you can even swap out the half-and-half for whole milk for a lighter version, but don’t blame me if it doesn’t have that “I’m in an ice cream shop” vibe.
And let’s talk about sugar. You want granulated sugar because it dissolves easily and sweetens without any grittiness. If you’re looking for a fun twist, try adding different flavorings or mix-ins later on.
Whether it’s vanilla extract, crushed cookies, or chunks of fruit, the world is your oyster (or should I say, your ice cream cone?). Just remember, the quality of your ingredients can really elevate your ice cream game, so don’t skimp on the good stuff.
Happy scooping!
How to Make Basic Ice Cream
Alright, let’s plunge into the delightful process of making your very own basic ice cream. Grab your 1 1/2 cups of half-and-half and 1/2 cup of heavy cream, and pour them into a saucepan. Now, it’s time to heat things up—literally. Bring this creamy concoction to a simmer over medium heat. As it warms, feel free to add any flavors you fancy, whether that’s a splash of vanilla extract or maybe a bit of cocoa powder if you’re feeling chocolatey. Just remember, this is a simmer, not a raging boil—no need to send cream flying all over your kitchen.
While your cream mixture is getting cozy on the stove, let’s shift our attention to the egg yolks. Take those 4 egg yolks and mix them with 1/2 cup of granulated sugar in a bowl. Whisk them together until the mixture becomes lighter in color and slightly frothy. This is where the magic happens, my friend.
Now, to prevent our poor egg yolks from scrambling when they meet the hot cream, we need to temper them. How do we do that? Easy. Just take a small amount of the hot cream and whisk it into the yolk-sugar mixture. Once that’s all combined, add the remaining cream mixture to the bowl.
Now, return everything back to the heat. Cook on low, gently stirring—not whisking—until the mixture thickens slightly. This might take a few minutes, but trust the process. You want a nice custard-like consistency.
Once thickened, strain the mixture to catch any rogue bits of cooked egg (because nobody wants that surprise in their scoop) and then refrigerate it until it cools down, about 2 to 4 hours.
When you’re ready, pop it in an ice cream maker and let it churn away until it reaches that soft-serve consistency. If you have any fun mix-ins like cookie chunks or fruit, toss them in right before you freeze it solid in the freezer.
And there you have it—homemade ice cream that’s bound to impress, and maybe even make you the coolest person on the block.
Basic Ice Cream Substitutions & Variations
Now that you’ve crafted your basic ice cream, let’s explore some fun substitutions and variations to make it uniquely yours.
You can easily swap half-and-half for coconut milk for a dairy-free option, or use flavored extracts like almond or mint to switch things up.
Want something fruity? Try adding pureed strawberries or crushed pineapple during the mixing phase.
For a richer taste, substitute brown sugar for granulated sugar.
If you’re a chocolate lover, mix in cocoa powder or chocolate chips.
The possibilities are endless, so don’t hesitate to get creative and personalize your ice cream experience!
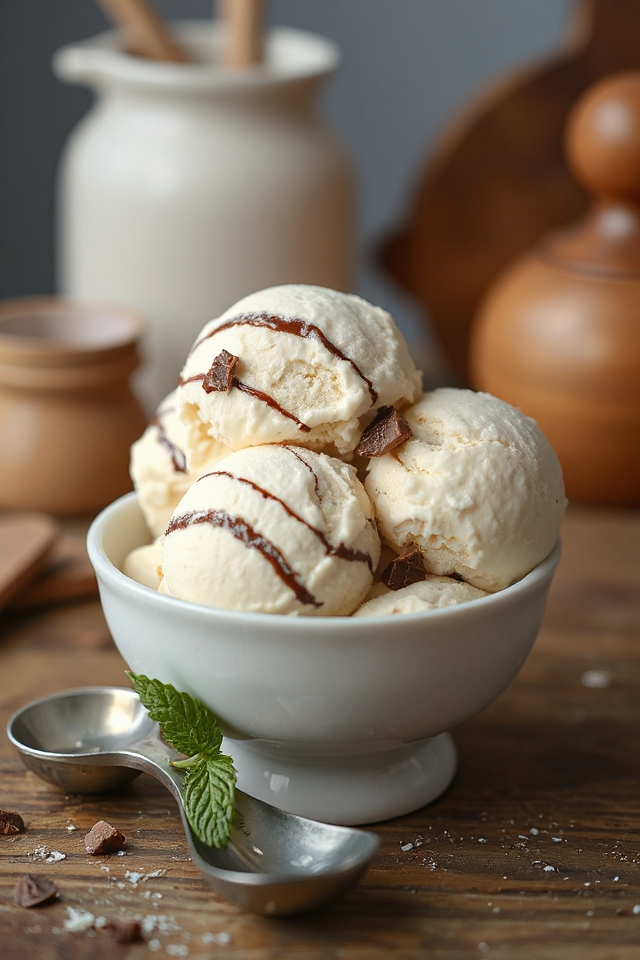
What to Serve with Basic Ice Cream
While enjoying your homemade ice cream, consider pairing it with delightful toppings and sides that enhance its flavor and texture.
I love adding warm chocolate fudge or caramel sauce for a rich contrast. Fresh fruits like strawberries or bananas add a revitalizing touch, while nuts provide a satisfying crunch.
Crushed cookies or sprinkles can also elevate the experience. For a unique twist, serve it with a slice of warm pie or cake.
Don’t forget about whipped cream—it’s a classic!
These combinations not only complement the ice cream but also create a fun, customizable dessert that everyone will enjoy.
Additional Tips & Notes
Although making ice cream might seem intimidating, there are a few tips that can really enhance your experience and results.
First, always chill your mixture thoroughly before churning; it makes a smoother texture. If you’re adding mix-ins, do so right before transferring to the freezer, ensuring they’re evenly distributed.
Consider experimenting with different flavorings—vanilla, coffee, or fruit purees can elevate your ice cream.
Finally, if you want a firmer outcome, let it sit in the freezer for a few hours after churning.
Trust me; these little adjustments can make a big difference in your homemade ice cream! Enjoy!