Why You’ll Love This Butterscotch Ice Cream Recipe
If you’re looking for a decadent treat that’s both creamy and rich, you’ll absolutely love this butterscotch ice cream recipe.
The first time I made it, I was blown away by the depth of flavor. The combination of buttery sweetness and smooth creaminess is pure bliss.
Every scoop melts in your mouth, leaving you craving more. Plus, it’s surprisingly easy to whip up!
I adore how it elevates any dessert, whether served alone or with warm pie.
Trust me, once you try this homemade delight, store-bought ice cream will never satisfy your cravings the same way again.
Ingredients of Butterscotch Ice Cream
When it comes to making butterscotch ice cream, having the right ingredients on hand is key. This creamy, dreamy treat relies on a mix of sweet and rich components that come together to create an indulgent dessert.
Let’s take a closer look at what you’ll need to whip up this delightful frozen concoction. Gather these ingredients, and you’re well on your way to something special.
- 1 cup firmly packed brown sugar
- 2 tablespoons butter
- 1 tablespoon vanilla extract
- 1 1/2 cups whipping cream
- 2 cups half-and-half or light cream
- 6 large egg yolks
Now, let’s chat about the ingredients a bit more. Brown sugar is the star here, bringing that deep, caramel-like flavor that makes butterscotch so irresistible.
You could try using light brown sugar for a milder taste or even dark brown sugar if you want to amp up the molasses notes. And don’t skimp on the butter; it adds a silky richness that ties everything together.
As for the cream, using high-quality whipping cream will make a noticeable difference in texture. And if you’re feeling adventurous, experiment with flavored extracts like almond or rum to give your ice cream a unique twist.
Who knew ice cream could be so customizable?
How to Make Butterscotch Ice Cream
Making butterscotch ice cream is a delightful adventure, and trust me, it’s worth every moment spent in the kitchen. First things first, grab your 1 cup of firmly packed brown sugar, 2 tablespoons of butter, and 1 tablespoon of vanilla extract. In a 1 to 2-quart pan, over medium heat, stir those ingredients together. It’s a bit like a sweet magic show as the butter melts and the sugar dissolves, creating a bubbly concoction that smells heavenly. This should take about 3 to 4 minutes.
Once that’s ready, whisk in 1/2 cup of the whipping cream until it’s smooth and well combined. Set this dreamy butterscotch mixture aside — we’ll come back to it soon.
Now, let’s move on to the cream base because that’s where the creaminess comes into play. In a larger 3-4 quart pan, combine the remaining 1 cup of whipping cream with 2 cups of half-and-half or light cream. Bring this to a gentle simmer over medium-high heat.
Meanwhile, in a bowl, beat those 6 large egg yolks. Once the cream mixture is warm, whisk in 1/2 cup of it into the egg yolks. This is a vital step to temper the yolks and avoid scrambling them (which, let’s be honest, no one wants).
After that, pour the yolk mixture back into the pan with the remaining cream. Stir it constantly over low heat until it thickens slightly — we’re talking about 2 to 4 minutes here. It should be thick enough to coat the back of a spoon.
When it reaches that point, remove it from the heat, and pour it through a fine strainer into a clean bowl to catch any rogue bits. This is where the magic happens: whisk in your butterscotch mixture. Chill this beauty until it’s cold, which takes about 2 hours, or if you’re more patient than I am, cover and chill it overnight.
Once everything has chilled and you’ve managed to resist the urge to eat it straight from the bowl, it’s time to freeze your creation in an ice cream maker according to the manufacturer’s instructions. This is the part where your kitchen transforms into an ice cream parlor.
If you want to enjoy it softly frozen, you can dig in right away. But if you’re feeling a bit more patient, transfer the ice cream to an airtight container and freeze it until firm, which takes at least 6 hours.
Now, you can sit back, relax, and bask in the glory of your homemade butterscotch ice cream. Just remember to save some for later; it’s hard to resist the temptation of a second scoop.
Butterscotch Ice Cream Substitutions & Variations
After crafting that luscious butterscotch ice cream, you might wonder how to customize it or make it your own.
I love swapping the brown sugar for coconut sugar for a deeper flavor. You could also try adding crushed cookies or nuts for some crunch.
If you prefer a lighter treat, use low-fat cream or a dairy-free alternative like coconut milk.
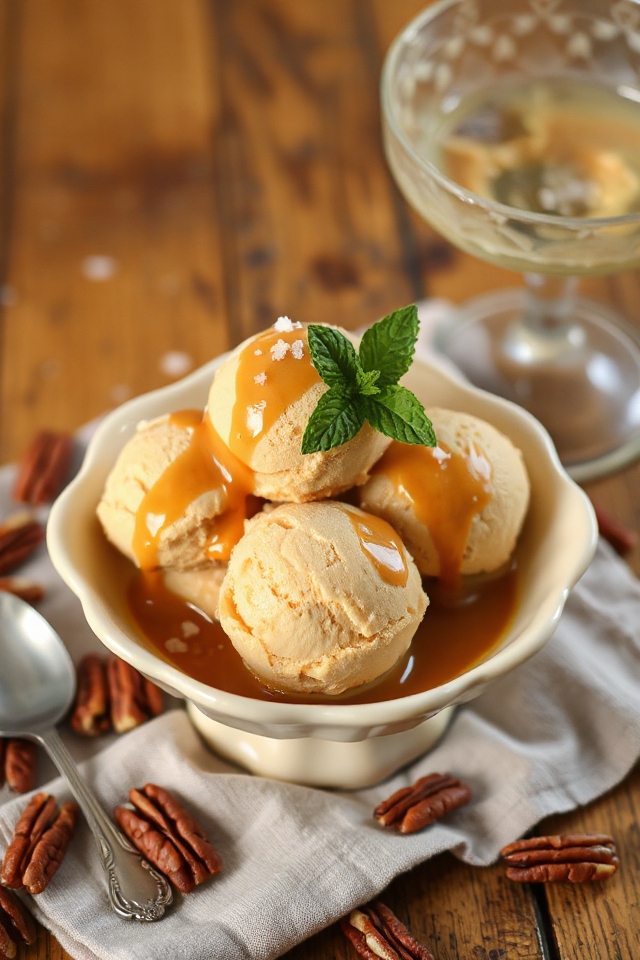
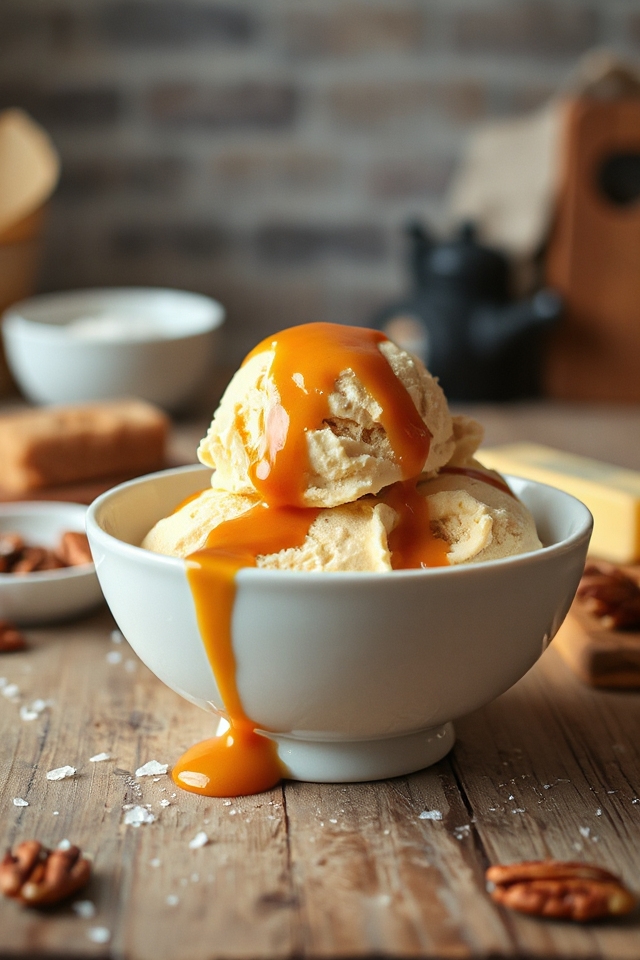
Want a twist? Add a swirl of chocolate fudge or a sprinkle of sea salt on top.
You can even infuse it with spices like cinnamon or nutmeg for a warm undertone.
Get creative and enjoy!
What to Serve with Butterscotch Ice Cream
Although butterscotch ice cream is delicious on its own, pairing it with the right accompaniments can elevate your dessert experience.
I love serving it with warm apple pie; the contrasting temperatures are heavenly. Crushed nuts, like pecans or walnuts, add a delightful crunch, too.
If I’m feeling indulgent, I’ll drizzle some chocolate or caramel sauce on top for extra sweetness. Fresh fruit, such as sliced bananas or strawberries, brings a revitalizing touch.
Finally, a sprinkle of sea salt can enhance the butterscotch flavor, creating a perfect balance. Trust me, these pairings will make your butterscotch ice cream unforgettable!
Additional Tips & Notes
To guarantee your butterscotch ice cream turns out perfectly, I recommend measuring all your ingredients accurately before you start.
Using fresh, high-quality cream elevates the flavor immensely, so don’t skimp on that.
Also, keep an eye on the cooking temperature; too high can lead to curdled eggs.
If you want a deeper flavor, consider adding a pinch of sea salt to the butterscotch mixture.
Don’t rush the chilling process; letting it sit longer enhances the taste.
Finally, if you don’t have an ice cream maker, pour the mixture into a shallow dish and stir it every hour until set.
Enjoy!