Why You’ll Love This Fresh Mint Ice Cream Recipe
If you’re craving a revitalizing treat, you’ll absolutely love this Fresh Mint Ice Cream recipe. The way the cool mint dances on your palate is nothing short of invigorating.
It’s perfect for those hot summer days or when you need a little pick-me-up. I adore how creamy and rich it is, yet light at the same time.
Plus, making it at home means I can control the sweetness and add just the right amount of minty goodness. Every scoop feels indulgent, but it’s really a delightful experience that brings a touch of nature right into your bowl.
You’ll keep coming back!
Ingredients of Fresh Mint Ice Cream
When it comes to crafting the perfect bowl of Fresh Mint Ice Cream, the ingredients are key. You want to make sure you have everything ready before diving into the fun part—actually making the ice cream. This recipe requires a delightful mix of creamy goodness and fresh flavors that will transport you to a sunny afternoon with every scoop. Trust me, once you taste it, you’ll be wondering why you didn’t whip this up sooner.
Here’s what you’ll need to gather:
- 1 cup whipping cream
- 1 cup milk
- 2 tablespoons fresh mint leaves, chopped
- 3 egg yolks
- 1/2 cup granulated sugar
- Green food coloring (optional)
- 6 tablespoons whipped cream (for garnish)
- 6 tablespoons grated dark chocolate (for garnish)
- Fresh mint leaves (for garnish)
Now, let’s talk about those ingredients a bit more. Fresh mint leaves are truly the star of this show. If you can, go for the freshest leaves you can find. You know, the kind that smells like a garden on a warm day?
And if you’re feeling adventurous, you could even try adding a splash of peppermint extract for an extra minty kick. Just don’t go overboard, or you might end up with a flavor that’s more toothpaste than treat.
Also, if you don’t have an ice cream maker, don’t panic! You can still make this ice cream; just give it a good stir every 30 minutes while it’s freezing. Sure, it’s a little more hands-on, but it’ll be worth it when you’re savouring that creamy, minty goodness.
How to Make Fresh Mint Ice Cream
Alright, let’s get down to the fun part—making that dreamy Fresh Mint Ice Cream. First things first, grab a saucepan and combine 1 cup of whipping cream and 1 cup of milk. Now, here’s where the magic begins: add in those lovely 2 tablespoons of chopped fresh mint leaves. Heat the mixture over medium heat until it’s just about to boil. Keep an eye on it, because nothing says “oops” quite like burnt milk.
Once it reaches that bubbling point, remove it from the heat and cover it up. Let it sit for about 15 minutes. This step is essential; it allows those minty flavors to really infuse into the cream and milk. Trust me, your future self will thank you.
While that’s steeping, it’s time to get your egg yolks in on the action. In a separate bowl, take 3 egg yolks and mix them with 1/2 cup of granulated sugar until the mixture is light and fluffy. This is where you can feel fancy—whisking away like you’re on a cooking show.
Now, strain your minty cream mixture to get rid of those leaves (bye-bye, mint leaves), and heat it to a boil again. Carefully pour that hot cream over your egg-sugar mixture, whisking like a pro. Place that bowl in a pan of hot water (a little makeshift double boiler action) and keep whisking until it thickens up, which should take about 10 minutes. If you fancy a little color, this is where you can add a few drops of green food coloring. Just a few, though; you don’t want it to look like a science experiment gone wrong.
Now comes the best part—freezing! Once your mixture is thick and creamy, remove the bowl from the hot water and transfer it to your ice cream maker. Let it churn for about 25 minutes, or until it looks thick and delicious.
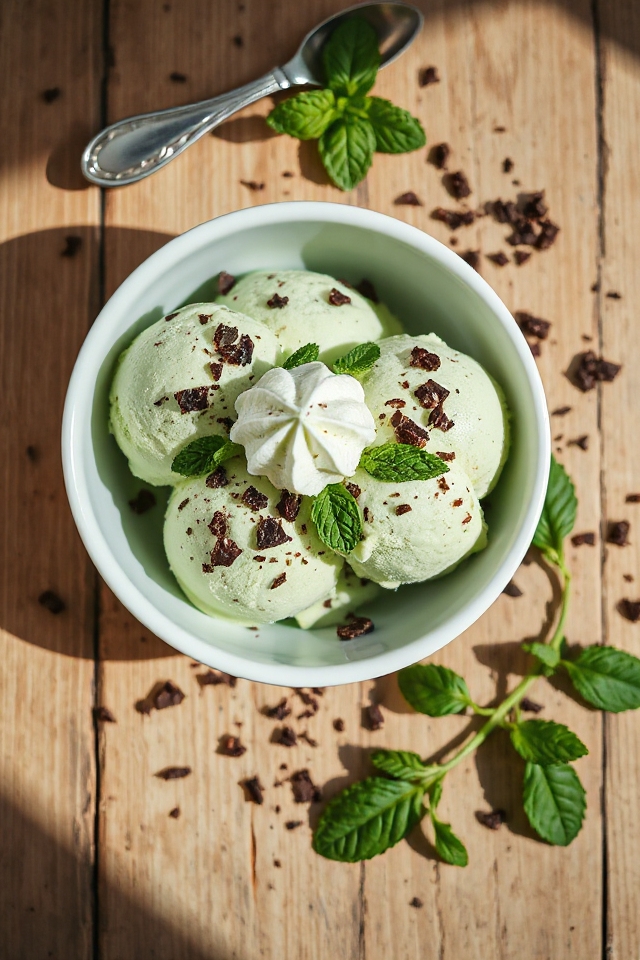
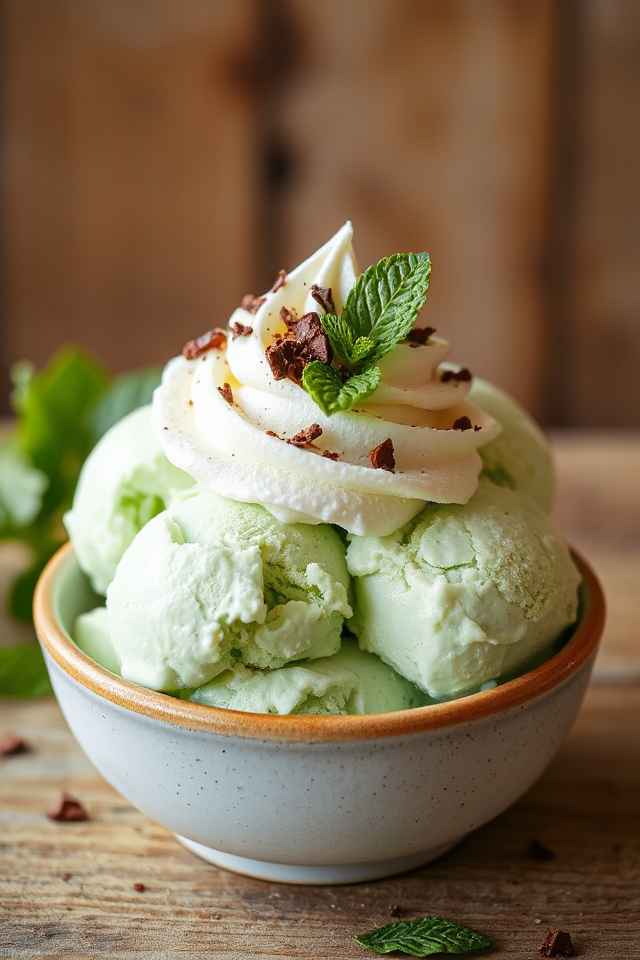
If you don’t have an ice cream maker, no sweat. Just pour the mixture into a freezer-safe container and stir it every 30 minutes until it reaches the perfect consistency. After it’s ready, scoop that minty goodness into serving bowls and don’t forget to garnish with 6 tablespoons of whipped cream, a sprinkle of 6 tablespoons of grated dark chocolate, and a few fresh mint leaves.
You’ll be in ice cream heaven, and who knows—you might just find yourself making this again and again. Enjoy!
Fresh Mint Ice Cream Substitutions & Variations
Once you’ve mastered the basic Fresh Mint Ice Cream recipe, you might want to get creative with substitutions and variations.
For a richer flavor, try using half-and-half instead of milk. If you’re feeling adventurous, swap in basil or lemon balm for a unique twist.
You can also add chocolate chips or crushed Oreos for extra texture. Want a dairy-free version? Use coconut cream and almond milk!
For a fun adult treat, mix in a splash of peppermint schnapps.
These variations keep things exciting while still delivering that invigorating minty goodness you love. Experiment and find your perfect blend!
What to Serve with Fresh Mint Ice Cream
Fresh mint ice cream pairs beautifully with a variety of desserts and toppings that enhance its invigorating flavor.
I love serving it alongside rich chocolate brownies or fudgy chocolate cake; the combination is heavenly. Fresh fruit, like strawberries or raspberries, adds a revitalizing contrast.
For a delightful crunch, sprinkle some crushed pistachios or almonds on top. If you’re feeling adventurous, drizzle a bit of warm chocolate sauce or caramel for an indulgent touch.
Finally, don’t forget a dollop of whipped cream and a sprig of fresh mint for that perfect finishing touch. Enjoy your delicious minty treat!
Additional Tips & Notes
While making fresh mint ice cream is a delightful experience, there are a few additional tips that can elevate your treat.
First, use fresh mint for the best flavor; the more vibrant the leaves, the better your ice cream will taste. If you want a stronger mint flavor, let the mint steep longer in the cream mixture.
Don’t skip straining the mint leaves; it guarantees a smooth texture. Finally, for a fun twist, try adding crushed chocolate or nuts.